This is my first ever dev blog post ever! I've been wanting to do something using an AI LLM for a while now, so I am definitely a bit late to the party. AI assistants have been around for quite a while now, but nonetheless, I wanted to create my own using various open source tools.
The First Iteration
For the first iteration of this project, I wanted a simple chat bot where I can simply call an LLM and render the response on a GUI.
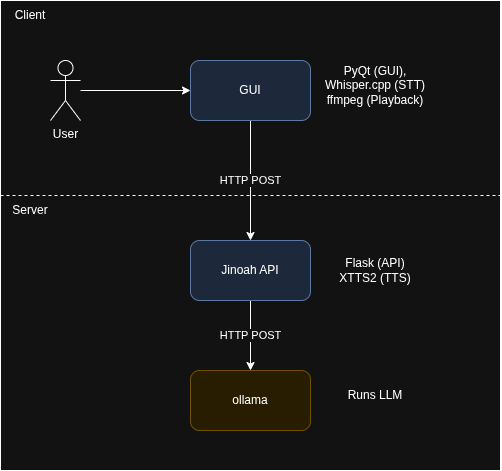
The frontend interface will utilize PyQt for creating the actual user interface. The goal of this interface will be to display an AI character alongside a microphone button for the user to speak to the AI.
The backend could run on a separate computer system, where it runs a Flask API that handles interactions related to the ask of the user. For the time being, we will simply send whatever the user says directly to the ollama instance (running the LLM). The request will look something like:
POST /query

{
    "prompt": "Hello there!"
}
and return the response:
200 OK

{
    "emotion": "happy",
    "output": "Hello there, how can I assist you today?",
    "audio": "AAAAAAAAAAAAAAAAAAAA="
}
Behind the scenes, the API will ask the ollama instance to give a response with an emotion. This was done by specifically asking for a response that is formatted with the emotion at the start of the response. For the example above, we would have received the string "[Happy] Hello there, how can I assist you today?". The emotion is the extracted from the actual output. The output will then be put through XTTS2 to produce audio bytes that will be played back on the client side.
Building the GUI
This is my first project that I used to learn PyQt. I have used several Desktop-GUI libraries before like Swing, JavaFX, and tkinter, but I wanted to use something different.
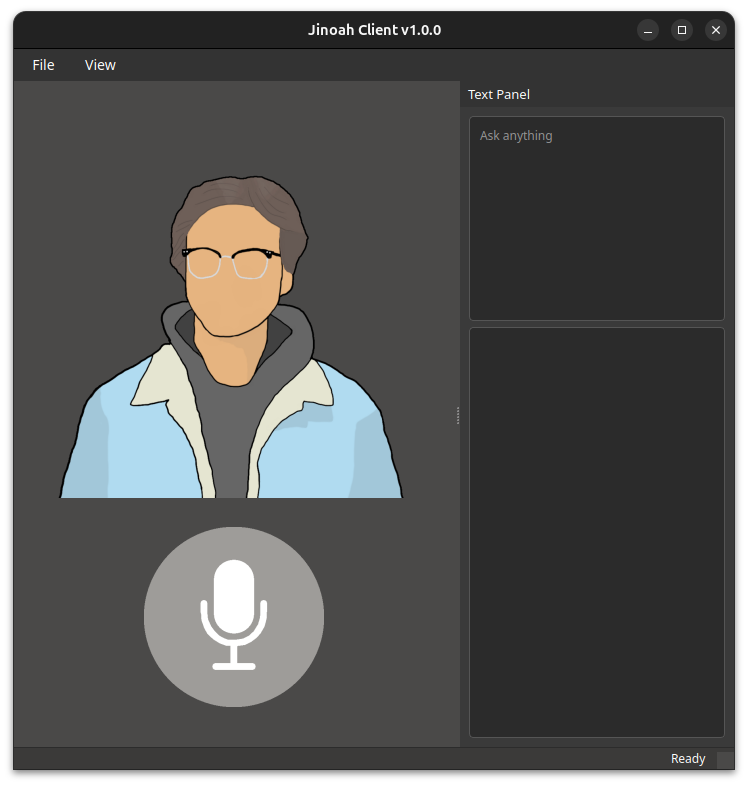
The goal of the GUI will be to display the AI character image with a microphone below it. The character image will change based on the emotion response we receive from the API. The microphone will also be clickable and allow us to speak into it.
I utilized the QMainWindow class for creating the main window. The snippet below shows a very
class JinoahWindow(QMainWindow):
    def __init__(self):
        super().__init__()
        self.setWindowTitle(f"{constants.PROGRAM_TITLE} {constants.PROGRAM_VERSION}")
        self.setStyleSheet(constants.STYLE)
        self.resize(720, 720)

if __name__ == '__main__':
    app = QApplication(sys.argv)
    window = JinoahWindow()
    window.show()
    sys.exit(app.exec_())
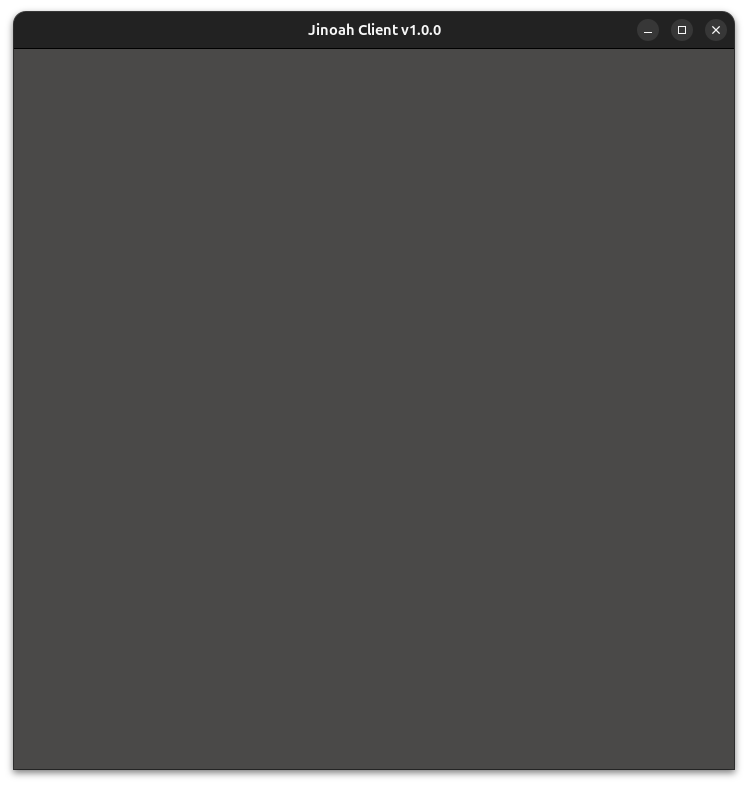
When we run, we get a simple GUI like the following:
PyQt offers various widgets that allow us to enhance our GUI. I utilized the QLabel class for displaying the AI character image to the screen and the QPushButton class for the microphone. I can use the setIcon function on both of these classes to set a QIcon for them.
Next, I wanted a standard menu bar at the top of the screen. This is common in any desktop computer application. For the time being, it holds a placeholder for a settings menu that will be added in the next iteration of the program. The QMainWindow contains a menubar attribute, that can be initialized easily:
menubar = self.menuBar()

file_menu = menubar.addMenu("File")
I created another menu called "View" which currently serves the purpose of giving a textual view of the input and output for the user. It will display a locked QDockWidget that contains two QTextEdit fields for displaying the string input from the user's microphone and the string output from the API.
Thread Issues
The application's AI processes are initiated when the user clicks on the microphone. The user will then speak into the microphone and their voice will be processed by whisper.cpp and turned into a string, updating the text panel. Afterward, the processed text will be sent as the prompt string to the API, where the API will call ollama to receive a response, then utilize XTTS2 to translate the LLM's response as speech. The client will then playback the response with ffmpeg.
This worked great in theory, but there was a huge underlying issue that became quite a headache for prolonged use.
The main window application of the PyQt runs on its own thread, meaning in order to process these events halts all other "PyQt" related tasks. For example, if I pressed the microphone to record a message to send, the GUI itself will be frozen until that process has completed.
The fix for this is to process each operation: voice recording, API call, and audio playback on separate threads. Luckily for us, PyQt makes this process rather straightforward. We can utilize QThread for creating a separate thread and QObject for creating a custom "Worker" class that we will run on that thread. We can then utilize the pyqtSignal function to send signals to our GUI that processes have completed. Below is an example of how this works:
# Inside of the JinoahWindow class....
def on_mic_clicked(self):
    if not self.disable_mic:
        self.disable_mic = True
        self.mic_button.setIcon(self.mic_icon_recording)
        self.update_status("Recording Audio...")

        # Initialize worker and thread it will run in
        self.audio_input_worker = AudioInputWorker()
        self.audio_input_thread = QThread()

        # Worker Setup
        self.audio_input_worker.moveToThread(self.audio_input_thread)
        self.audio_input_thread.started.connect(self.audio_input_worker.run)
        self.audio_input_worker.update_text.connect(self.process_audio_input)
        self.audio_input_worker.finished.connect(self.audio_input_thread.quit)
        self.audio_input_worker.finished.connect(self.audio_input_worker.deleteLater)
        self.audio_input_thread.finished.connect(self.audio_input_thread.deleteLater)

        # Start the Worker
        self.audio_input_thread.start()
    else:
        print("Microphone disabled due to current process ongoing...")

def process_audio_input(self, text):
    # Function that is called after audio input has been received
    # Where "text" is the transcript
    pass

# Worker Class for handling Audio Input
class AudioInputWorker(QObject):
    finished = pyqtSignal()
    update_text = pyqtSignal(str)

    def run(self):
        speech.record_audio_vad()
        transcript = speech.transcribe_audio()
        self.update_text.emit(transcript)
        self.finished.emit()
The action that the microphone button has will call the on_mic_clicked function, which will then initialize the a worker which will record our microphone's audio. This all runs on a separate thread, meaning the GUI application will not freeze when we are recording audio. When the start function is called on the thread, the run function from the worker will be initiated on that thread. The signals utilize the emit function to return a response. In the audio processing case, the update_text signal represents the signal for when we have successfully both recorded our voice using speech.record_audio_vad and then converted that to a string using speech.transcribe_audio. The transcript string is the string from our speech. We pass this in the emit function to signal that it has completed. Afterward, we signal that the worker is completed using the finished signal. The worker is setup to call the process_audio_input method when the transcript has been returned and safely delete the threads when the finished signal is complete.
Future Plans
There are a lot of ways I want to expand upon this AI program. At the moment, it serves as a very simple chat bot that can help with any prompt I give the LLM. In the future, I plan to implement:
- Reminders: The AI will "wake up" and read you a reminder. You can also ask it to create, update, and delete reminders.
- Memory: I want to utilize a Vector database to allow the AI to remember things about itself and about the conversations that we have had with it. The vector database could be used for long-term memory, and something smaller like a simple list could be used for short term memory.
- Schedule Creation: I work on a lot of personal projects and I often prioritize them based on what I am thinking that day, so many of them get left in the dark. It would be cool to have the program connect to my printer and print out my schedule, including what personal projects I'll work on.